How to Manage Your Subscription
Click2Call operates on a pre-pay system. Before you can make calls, add phone numbers, or use paid features, you need to load credit into your account. This guide walks you through the Account → Payments page and explains every element.
How the pre-pay system works
- Your account balance is charged for monthly line fees, call usage, and any add-ons.
- You can set up auto top-up so your account never runs out of credit.
- All prices are shown in AUD ex GST.
- Minimum top-up amount is $10.00.
Log in and check your Account Summary
Go to portal.click2call.com.au and sign in. After logging in you will land on the Account Summary page. This page shows your current balance at a glance.
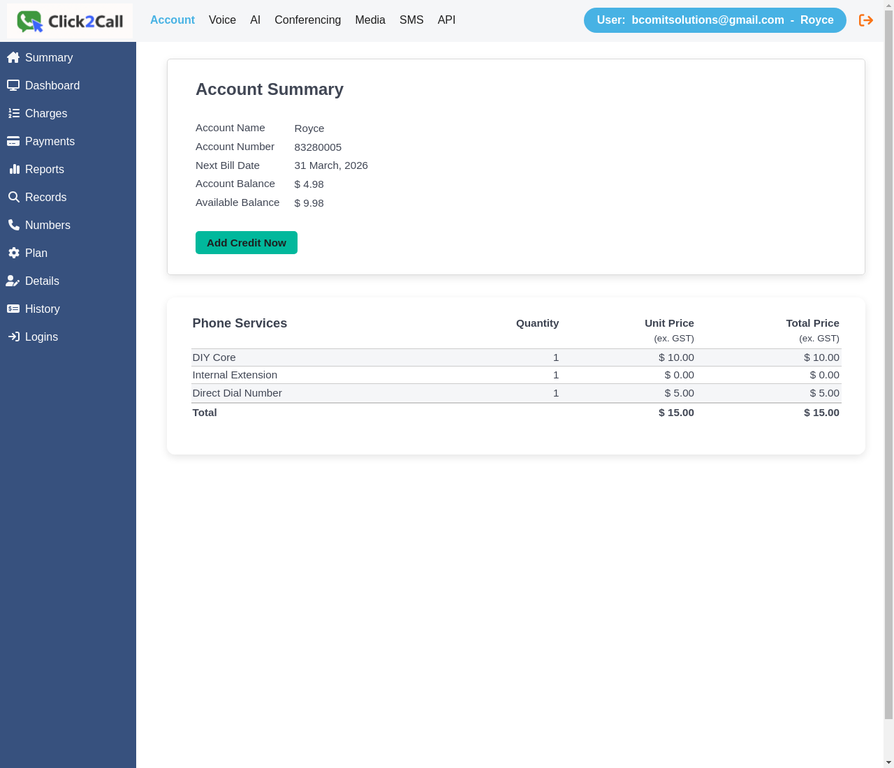
| Element | Description |
|---|---|
| Account Balance | Your total credit balance including any pending charges. |
| Available Balance | The amount available to spend after reserving funds for your next bill date. |
| Next Bill Date | The date your monthly line fees will next be deducted from your balance. |
| Phone Services table | A breakdown of your active services, their unit prices (ex. GST), and total monthly cost. |
| Add Credit Now button | A shortcut button that takes you directly to the Payments page to top up your balance. |
Navigate to Account → Payments
Click Payments in the left sidebar under the Account section, or click the yellow Add Credit Now button on the Account Summary page. Both take you to the same Payments page.
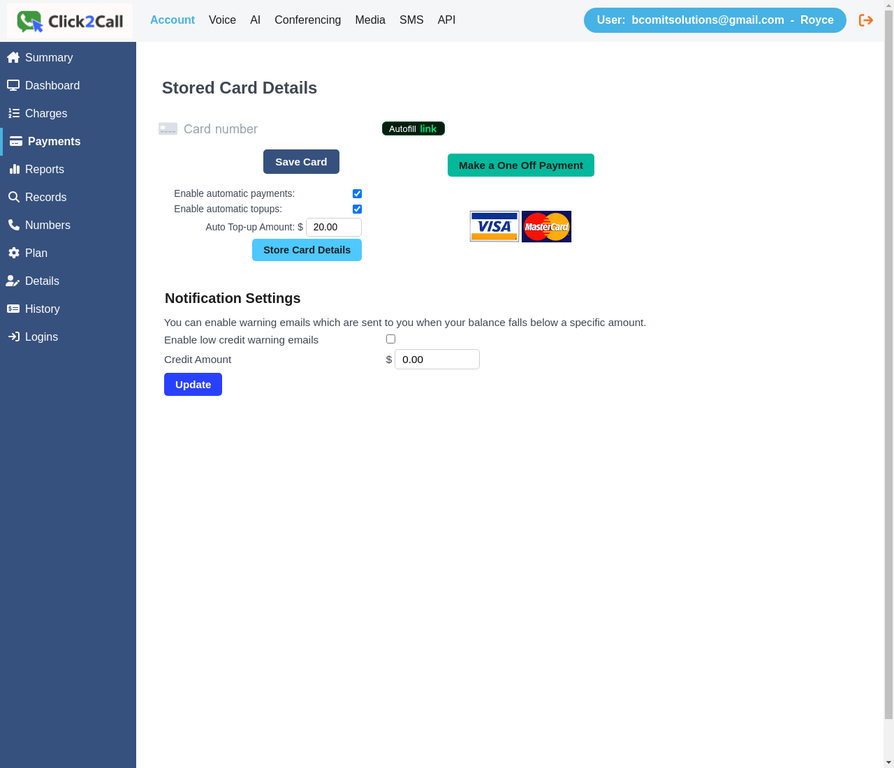
Understanding the Payments page
The Payments page is divided into two sections: Stored Card Details and Notification Settings. Here is a full explanation of every element.
Stored Card Details
| Element | Description |
|---|---|
| Card number field | Enter your Visa or Mastercard credit or debit card number here. The portal uses Stripe for secure card processing — your card details are never stored on Click2Call servers. |
| Save Card button | Saves your card details securely for future payments and auto top-ups. You must save a card before enabling automatic payments. |
| Make a One Off Payment button | Charges your saved card immediately for the amount shown in the Auto Top-up Amount field. Use this when you want to manually add credit without setting up automatic top-ups. |
| Enable automatic payments | When ticked, the portal will automatically charge your saved card on your monthly bill date to cover your line fees. |
| Enable automatic top-ups | When ticked, the portal will automatically top up your account when your available balance falls below a threshold. This prevents service interruptions during high-usage periods. |
| Auto Top-up Amount | The dollar amount (AUD inc. GST) to charge your card each time an automatic top-up is triggered. Minimum value is $10.00. |
| Store Card Details button | Saves your automatic payment preferences (checkboxes and top-up amount) after you have made changes. |
| Visa / Mastercard logos | Indicates the accepted card types. Both Visa and Mastercard credit and debit cards are accepted. |
Notification Settings
| Element | Description |
|---|---|
| Enable low credit warning emails | When ticked, the portal will send an email to the account administrator when your balance falls below the threshold you set. Recommended if you are not using auto top-up. |
| Credit amount threshold | The balance level (in AUD) at which a low credit warning email is sent. For example, entering $10.00 will trigger a warning email when your balance drops below $10.00. |
| Update button | Saves your notification settings after making changes. |
Add credit to your account
To add credit, follow these steps:
- Enter your card number in the card field (Visa or Mastercard).
- Click Save Card to securely store your card details.
- Set your desired Auto Top-up Amount (e.g. $20.00).
- Click Make a One Off Payment to immediately add that amount to your balance, or tick Enable automatic top-ups and click Store Card Details to set up recurring top-ups.
Tip: We recommend enabling both automatic top-ups and low credit warning emails to ensure your service is never interrupted.
✓ Credit added — you are ready to go
With credit in your account you can now add phone numbers, make calls, and use all platform features. Next steps:
- Add a phone number to start receiving calls
- Add an extension for each team member
- Set up a call flow to route inbound calls