Adding a New Extension
Extensions are the internal numbers used within your phone system. Each user or device typically has its own extension. This guide walks you through adding a new extension in the Click2Call portal, using a real example with step-by-step screenshots.
Log in to the portal
Navigate to portal.click2call.com.au and sign in with your account credentials. Once logged in, you will land on the Account Summary page.
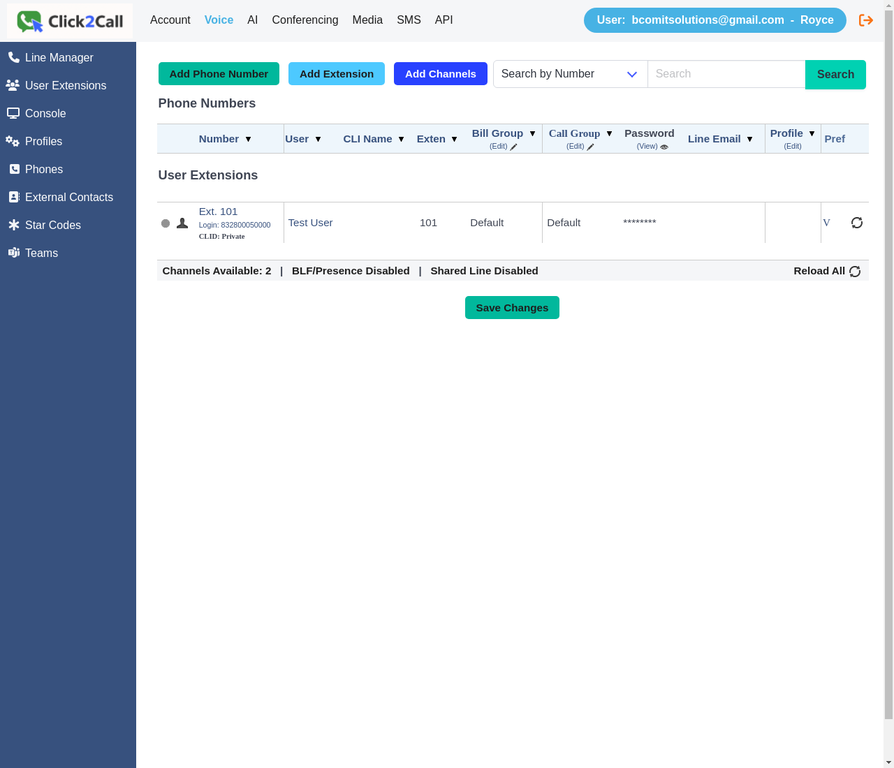
The Voice Numbers page after logging in
Go to Voice → Numbers
Click Voice in the top navigation bar. You will see the Phone Numbers and User Extensions table, along with three action buttons at the top: Add Phone Number, Add Extension, and Add Channels.
The Voice Numbers page showing the Add Extension button
Click “Add Extension”
Click the Add Extension button. The portal will navigate to the User Details page, where you can see all existing extensions and a New User entry ready to be configured.
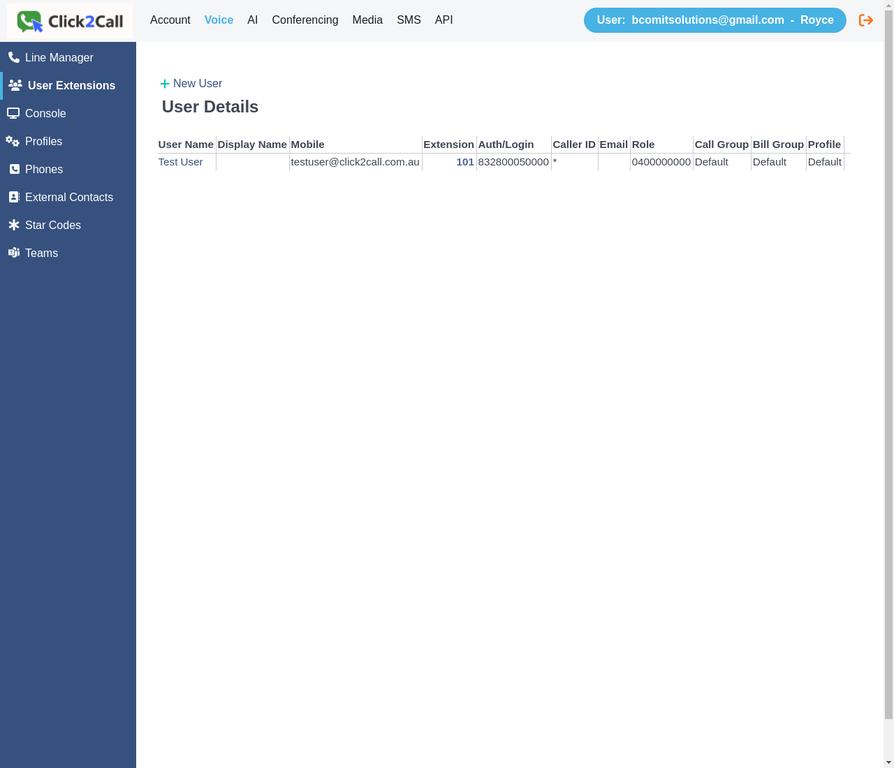
User Details page — click “New User” to open the form
Click “New User” to open the form
Click New User at the top of the list. The Add a new User form will appear with all the fields required to set up the extension. The extension number is automatically pre-filled with the next available number (e.g. 102).
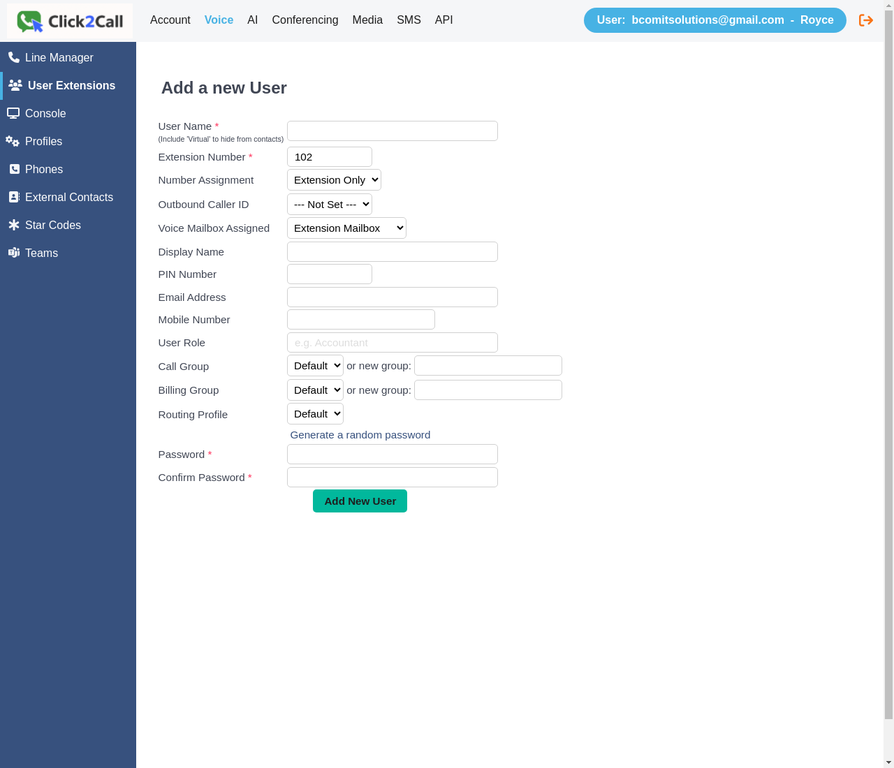
The Add a new User form — extension number is pre-filled automatically
Fill in the user details
Complete the form fields for the new extension. The key fields are:
| Field | Description | Example |
|---|---|---|
| User Name * | Full name of the person using this extension | Sarah Mitchell |
| Extension Number * | Internal extension number (auto-filled) | 102 |
| Number Assignment | Choose Extension Only or assign an Inbound Business Number number | Extension Only |
| Display Name | Name shown on outbound caller ID | Sarah Mitchell |
| Email Address | Used for voicemail-to-email delivery | [email protected] |
| PIN Number | 4-digit PIN for voicemail access | 1234 |
| User Role | Optional label for the user’s role | Sales Manager |
| Password * | SIP/portal password — click “Generate” for a secure one | Auto-generated |
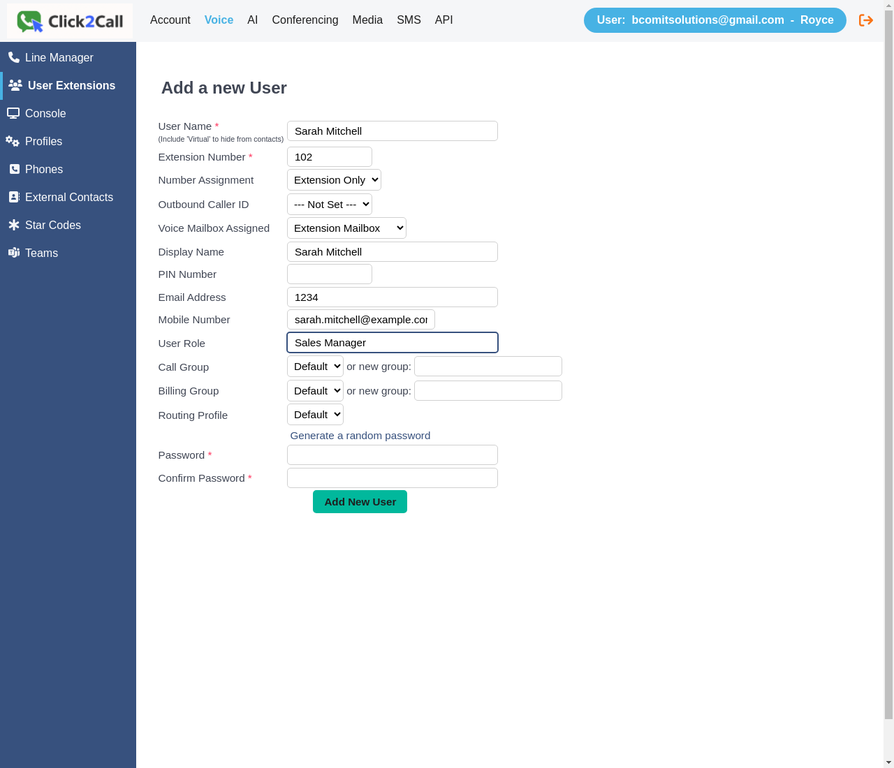
Example: form filled in for Sarah Mitchell, Ext. 102, Sales Manager
Generate a password and click “Add New User”
Click Generate a random password to create a secure SIP password automatically — the Password and Confirm Password fields will be filled in. Then click the Add New User button to save the extension.
Important: Make a note of the generated password before saving — you will need it to register a desk phone or softphone app to this extension. The password is not shown again after the form is submitted.

Password generated — click “Add New User” to create the extension
Extension created — next steps
Once saved, the new extension will appear in the User Extensions list on the Voice Numbers page. The extension is now active and ready to be assigned to a device. Your next steps are:
- Register a desk phone using the extension number and SIP password
- Or install a softphone app (e.g. Zoiper, Bria) and log in with the SIP credentials
- Add the extension to a ring group or call flow to receive inbound calls
Still need help?
Our Australian support team is available to assist you.