Adding a New User
This guide explains how to create a new user in the Click2Call portal, configure their access level, and send them their login details. Each user gets their own secure login to the portal, allowing them to manage their own extension, view call recordings, and access features based on the permissions you assign.
Navigate to Logins
Log in to the Click2Call portal, click the Account tab in the top navigation bar, and then select Logins from the left-hand navigation menu. This section lists all existing users on your account.
Add a New User
Click the Add New User button to open the user creation form. The user's email address will serve as their username for logging in to the portal.
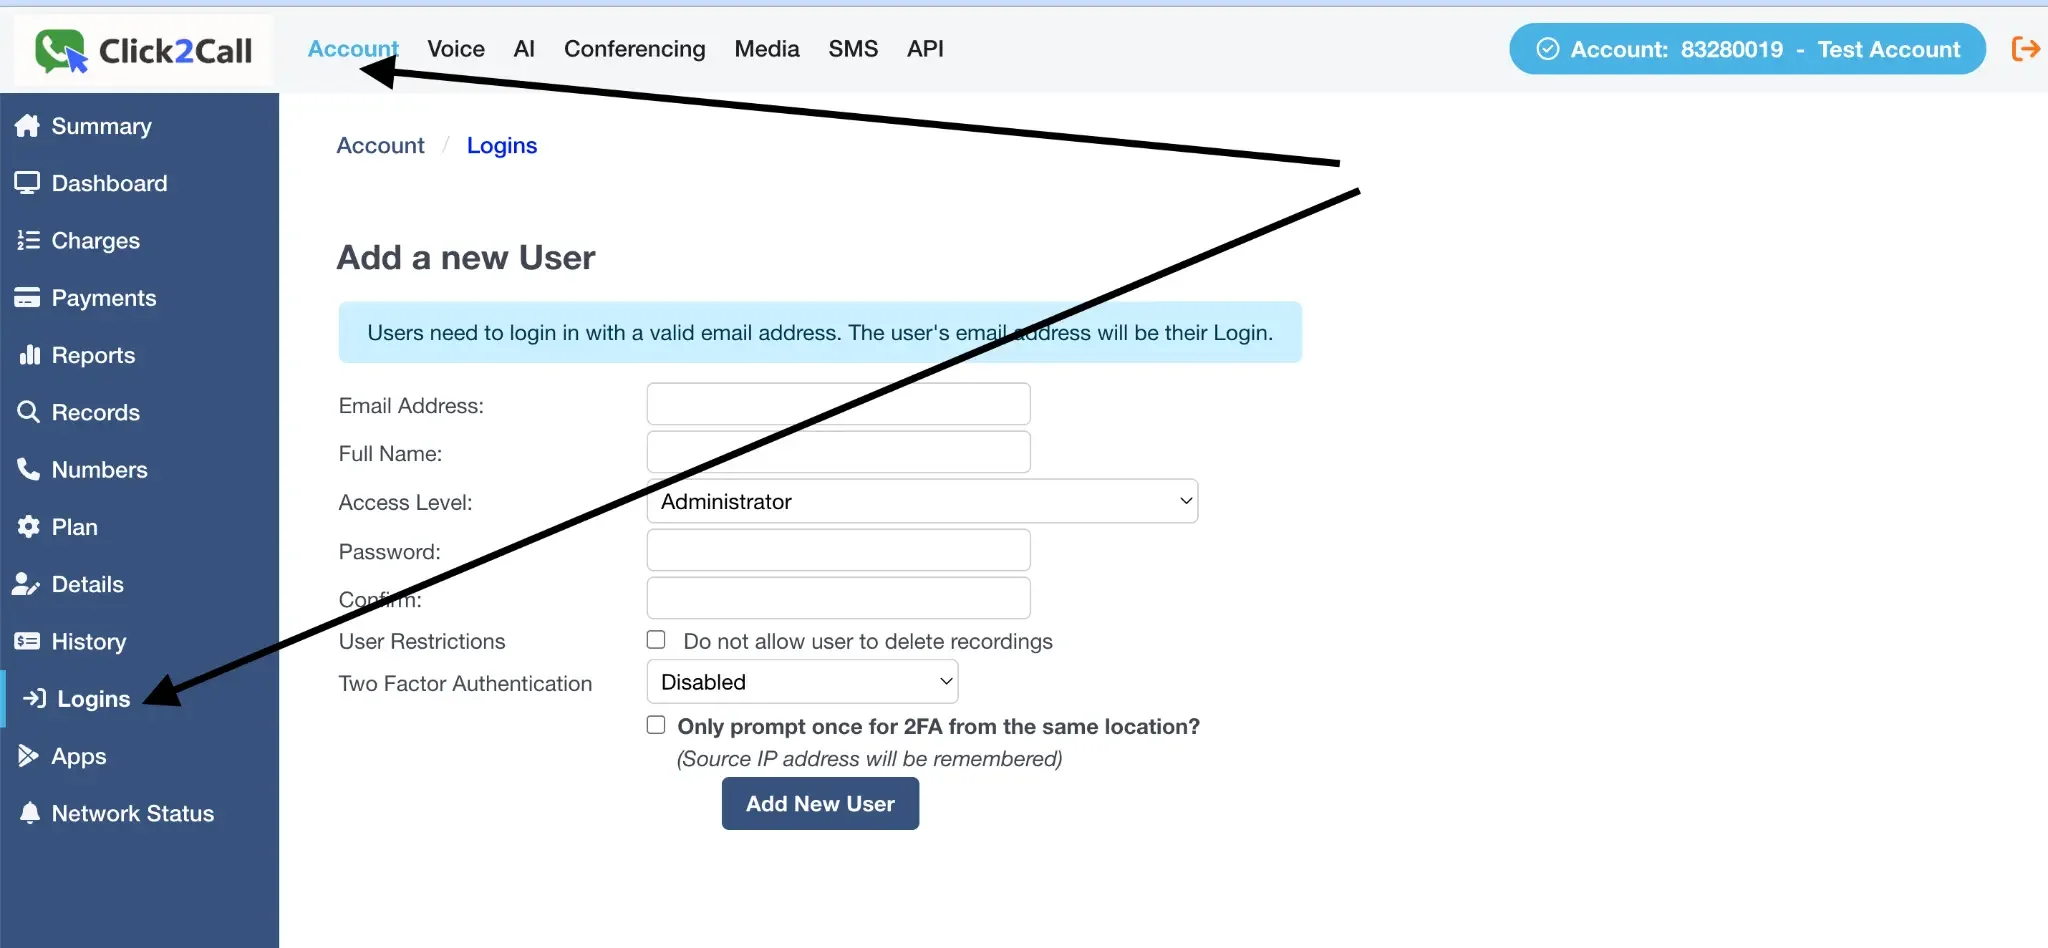
Key fields to complete:
- First Name & Last Name: The user's full name as it will appear in the portal and on call records.
- Email Address: This becomes the user's login username. A welcome email with login instructions is sent to this address.
- Access Level: Controls what the user can see and do. Administrator provides full account access including billing and configuration. User restricts access to their own extension and call history only.
- User Restrictions: Tick this box to prevent the user from deleting call recordings — useful for compliance and quality assurance purposes.
- Two-Factor Authentication (2FA): When enabled, the user must verify each login via a one-time code sent to their email address, adding an extra layer of security.
Once all fields are completed, click the Add New User button to save. The new user will appear in the Logins list immediately.
User Receives Welcome Email
After the user is created, the system automatically sends a welcome email to the address you provided. This email contains a link for the user to set their own password and access the portal for the first time. If the user does not receive the email, ask them to check their spam or junk folder, or use the Resend Welcome Email option from the Logins list.
Assign an Extension (Optional)
Once the user login is created, you can link it to an extension so the user can make and receive calls. Navigate to Extensions & Users in the portal, select the relevant extension, and assign the new user's login from the dropdown. This allows the user to log in to a softphone or desk phone using their credentials. See the Adding a New Extension guide for full details.
Frequently Asked Questions
How many users can I add to my account?
What is the difference between an Administrator and a User?
The new user did not receive their welcome email — what should I do?
Can I change a user's access level after they have been created?
How do I delete a user?
Related Guides
Still need help?
Our Australian support team is available to assist you.